Der Wohnwagen
The Living Wagon
|
|
Der Wohnwagen
|
|
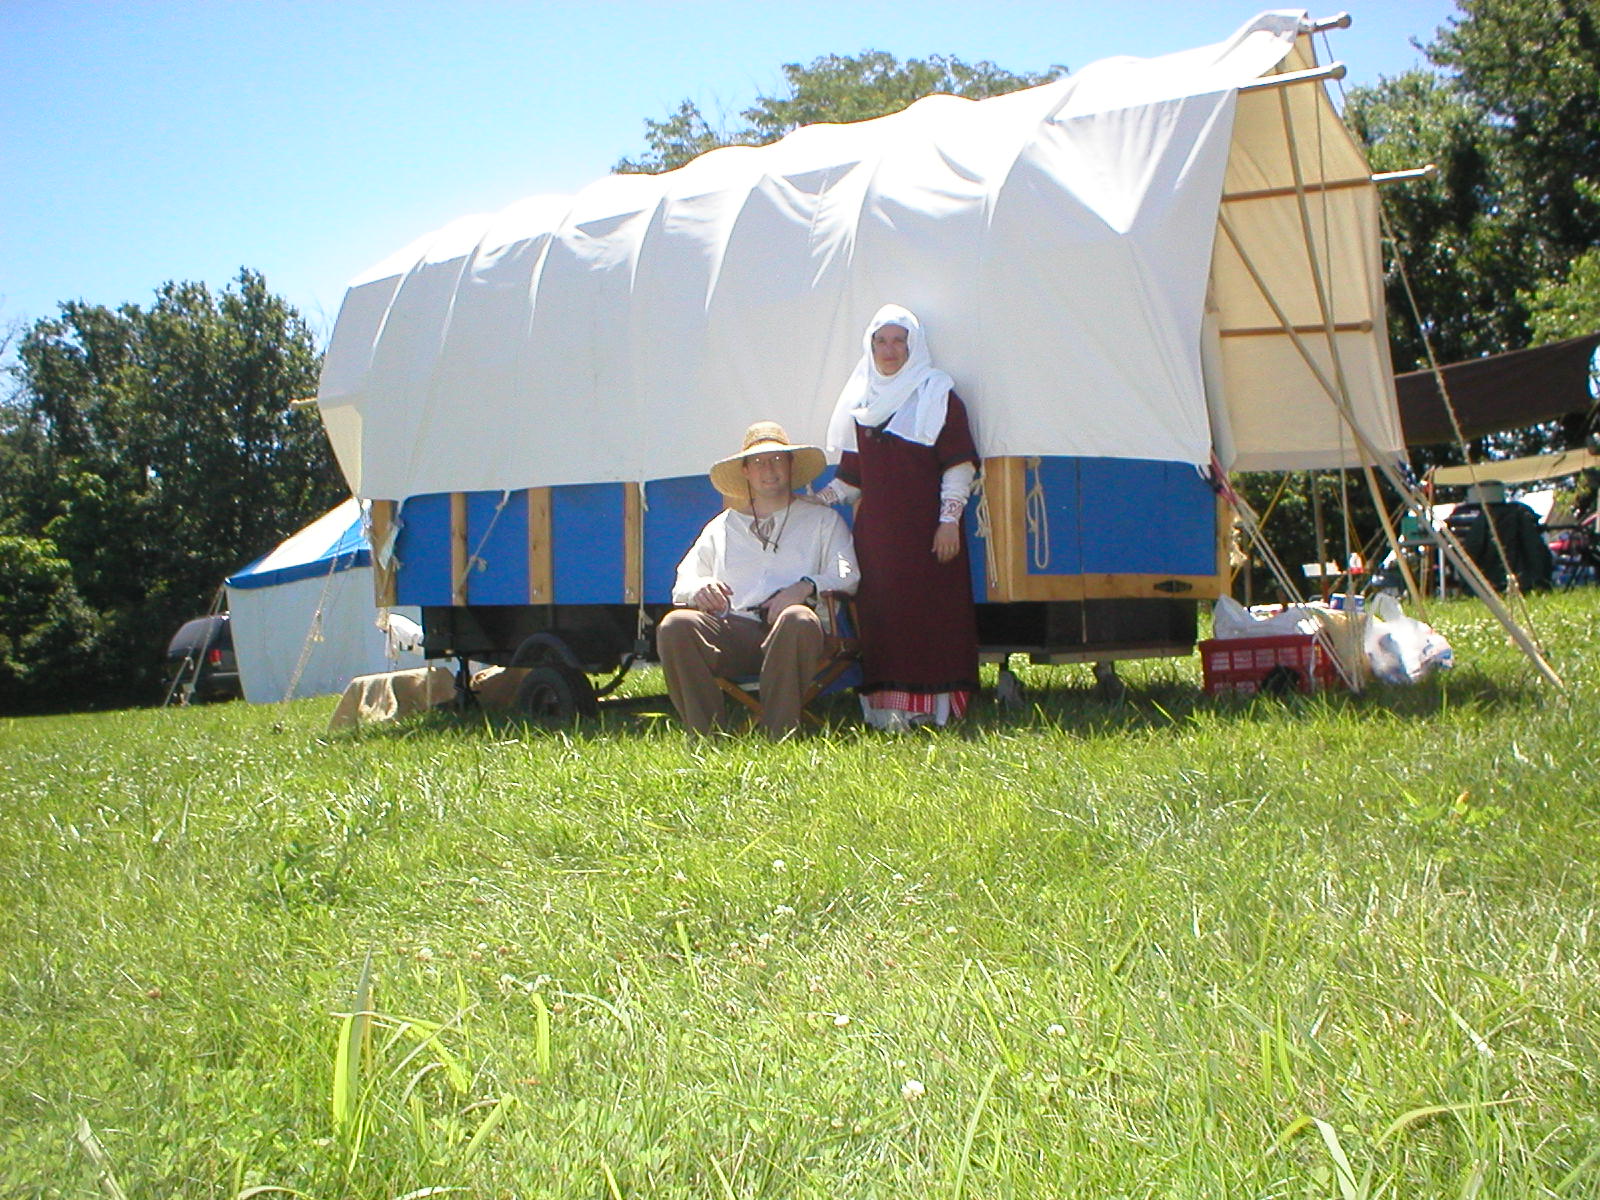
In preparing to go to my very first SCA war, I got it into my head to actually make a medieval covered wagon. I cannot deny that I got a lot of inspiration from the various websites describing gypsy vardos for SCA camping. But I do not have a vardo, since I am not a gypsy, and many people insist that vardos are out of period. Covered wagons, however, are period.
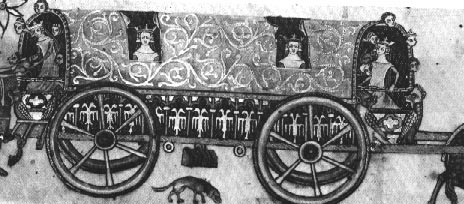
I have found several manuscript illustrations of them. My wagon is based most closedly on the illustration found in the Luttrell Psalter. See also Wagons Online Documentation.
I spent years playing with different designs for mobile SCA shelters - tents, Russian log cabins, half-timbered huts, and of course, various incarnations of the covered wagon. I decided that the covered wagon would be the best combination of the portability of a tent with the "dry floor off the ground" features of a hard structure. The proportions had to have enough height for my 6 foot tall husband, and room for a full size bed, since I knew he wouldn't tolerate sleeping on anything smaller. The exact construction details had to wait until I found a trailer to build the design on.
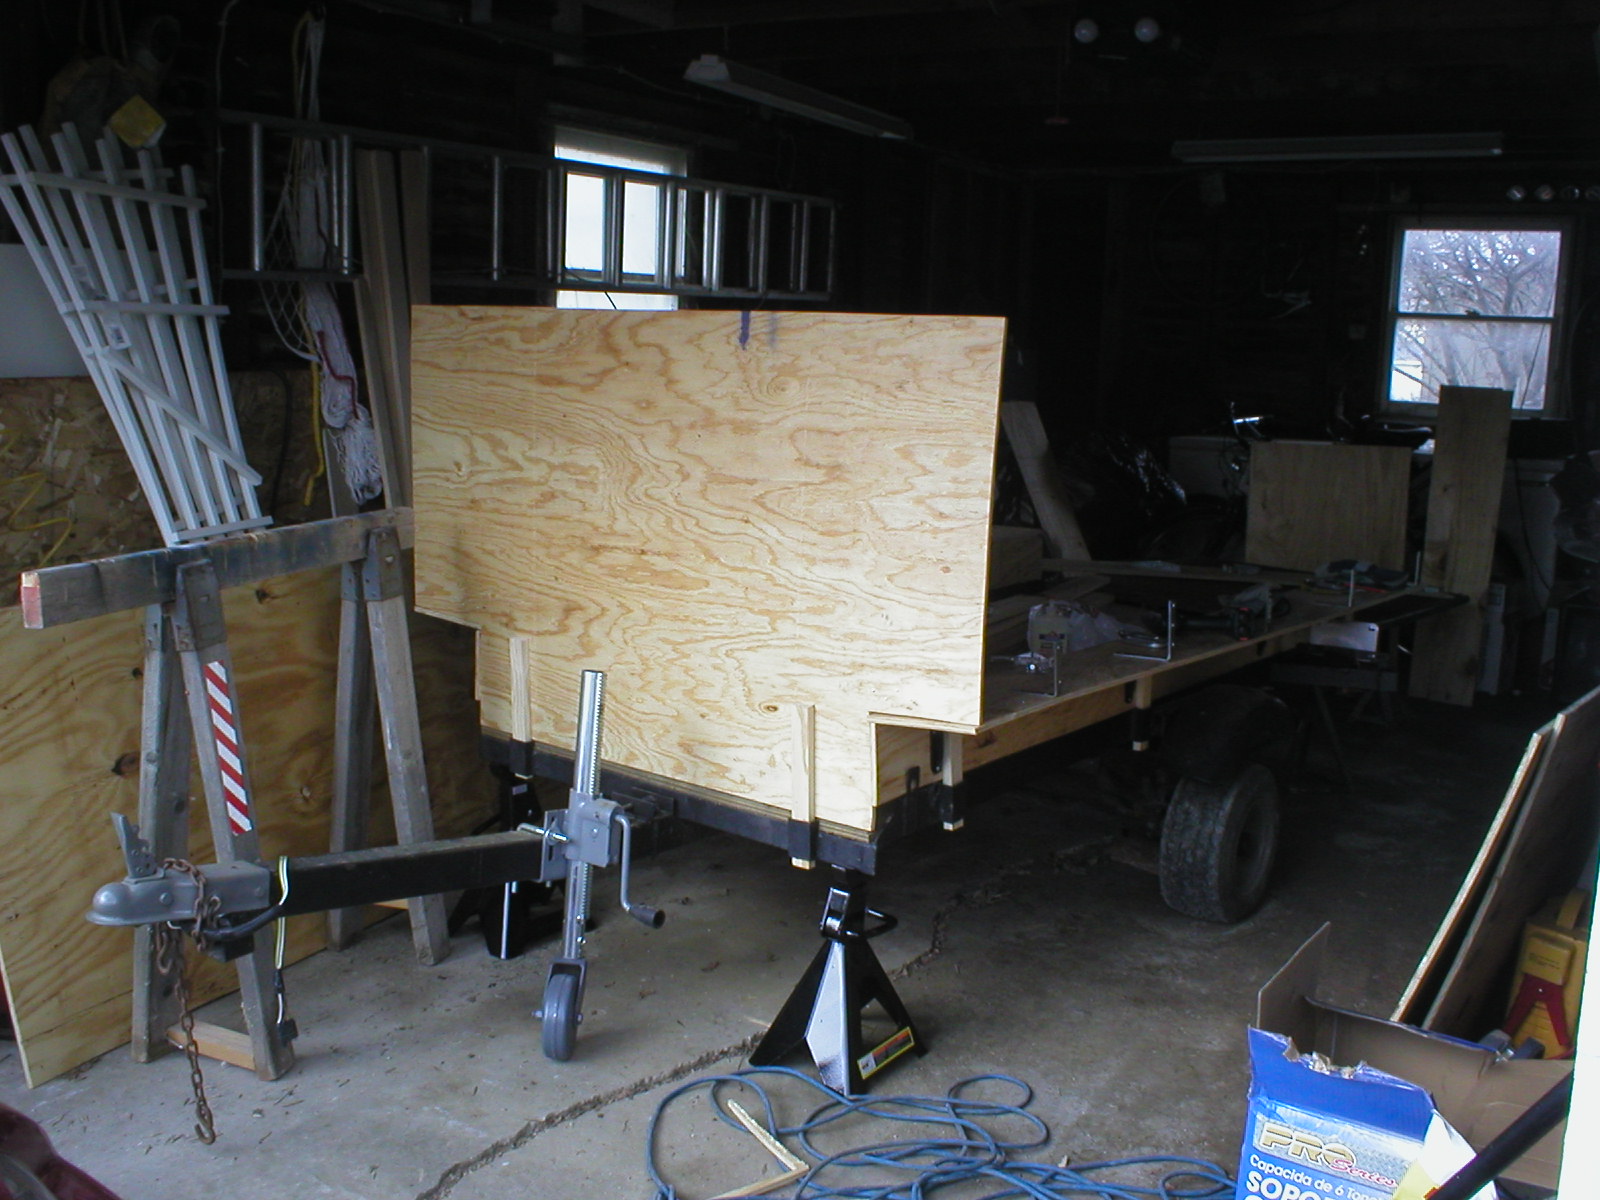
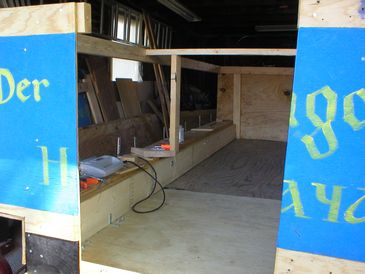
This is the trailer in its original condition.
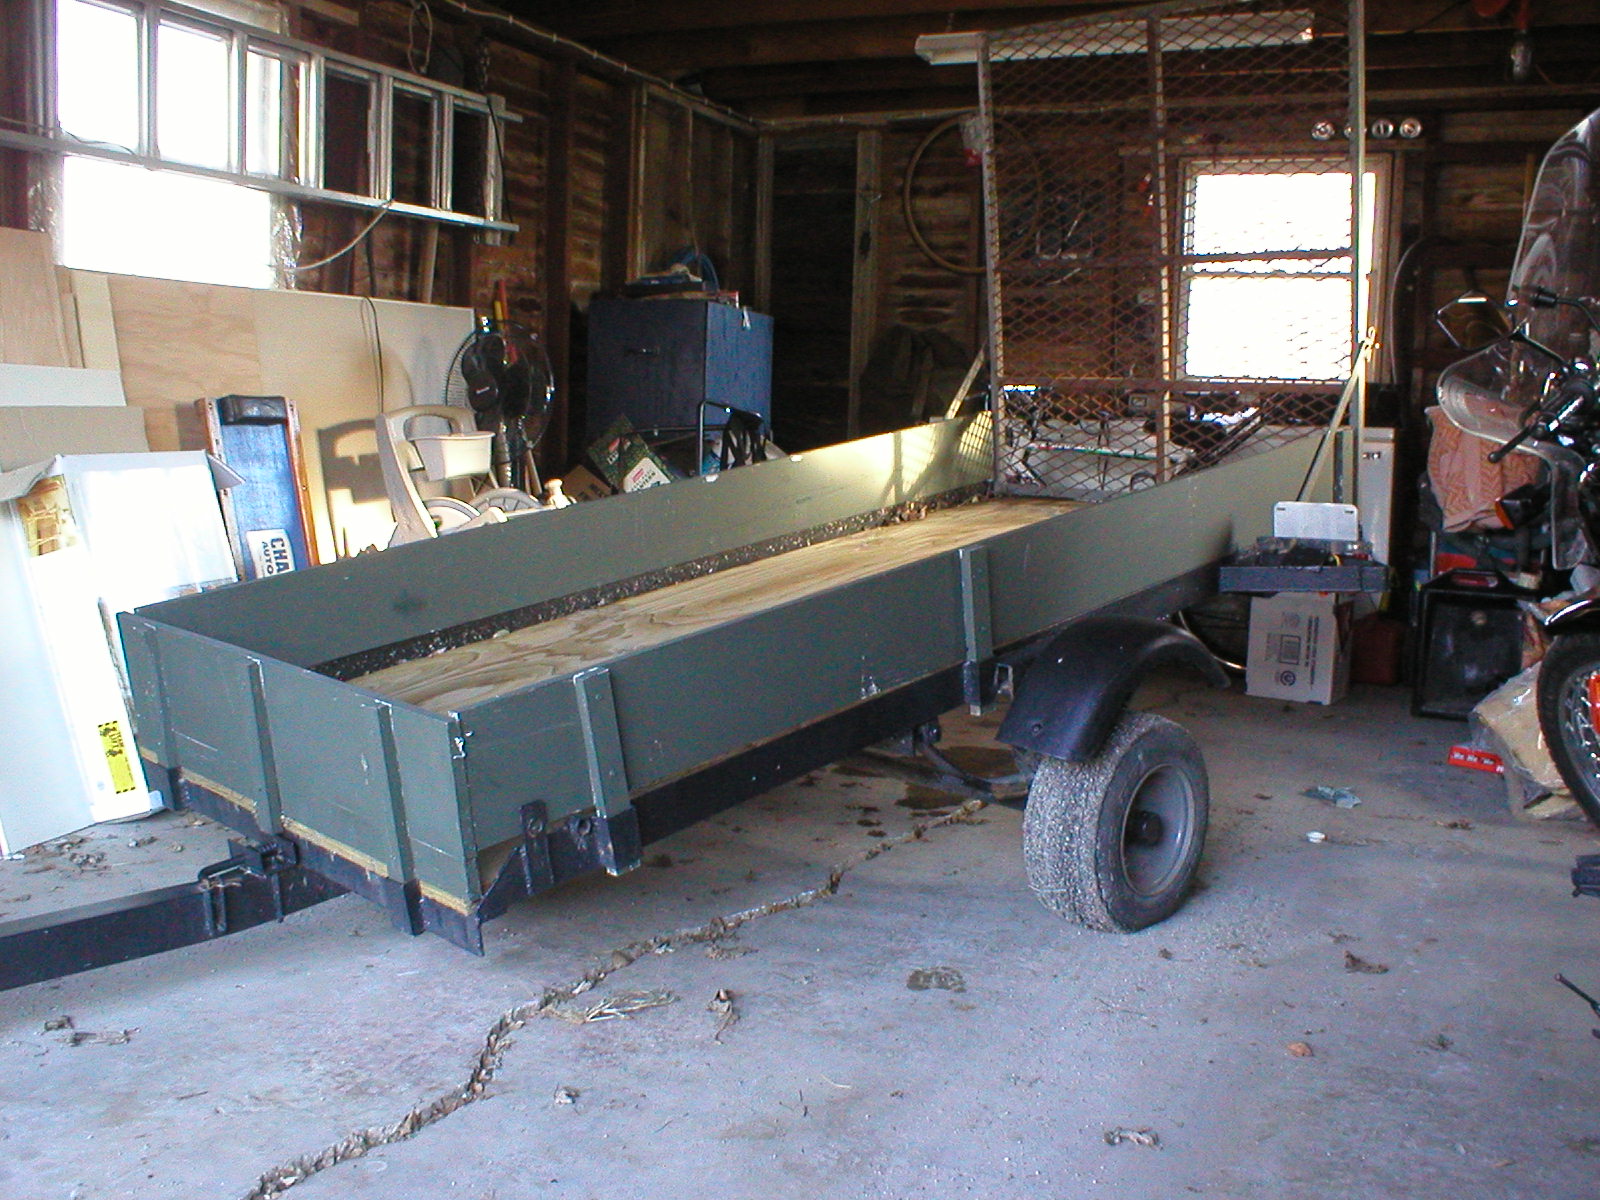
Obviously, a 4x8 foot trailer needs some adjustments to fit a full size bed, which is 5x7 feet. But at least I knew that our car would be able to pull it. Our trailer came with a 4x4 foot ramp for loading snowmobiles, and I figured I could use that to get more living space. I just needed 6 jack-stands to hold everything up level and stable.
I based the wagon on 1/2 inch exterior grade plywood - cheap! I tried to work out my major cuts to make maximum use of the 4x8 sheets. Each side of the main part of the trailer, including the "shelf", was made of a single sheet of plywood. Similarly, both sides of the ramp part of the trailer were made of a single sheet of plywood. (So I'd completely used three sheets of plywood by this point.)
The sides of the trailer are about 39 inches high, with a 9 inch wide "shelf" built in about 10 inches above the floor to give the extra width for the bed.
Connectors were 1x2 pieces of lumber to attach the sides to the bed of the trailer (just like the original short walls of the trailer), lots of #8 screws, a little wood glue, metal "L" connectors, several 6x8 inch shelf brackets (for the "shelves", of course), door hinges with removable pins, a 2x10 board to cut into triangular supports for various angles in the wagon walls, and some other bits of hardware that escape me at the moment.
Some construction pictures.
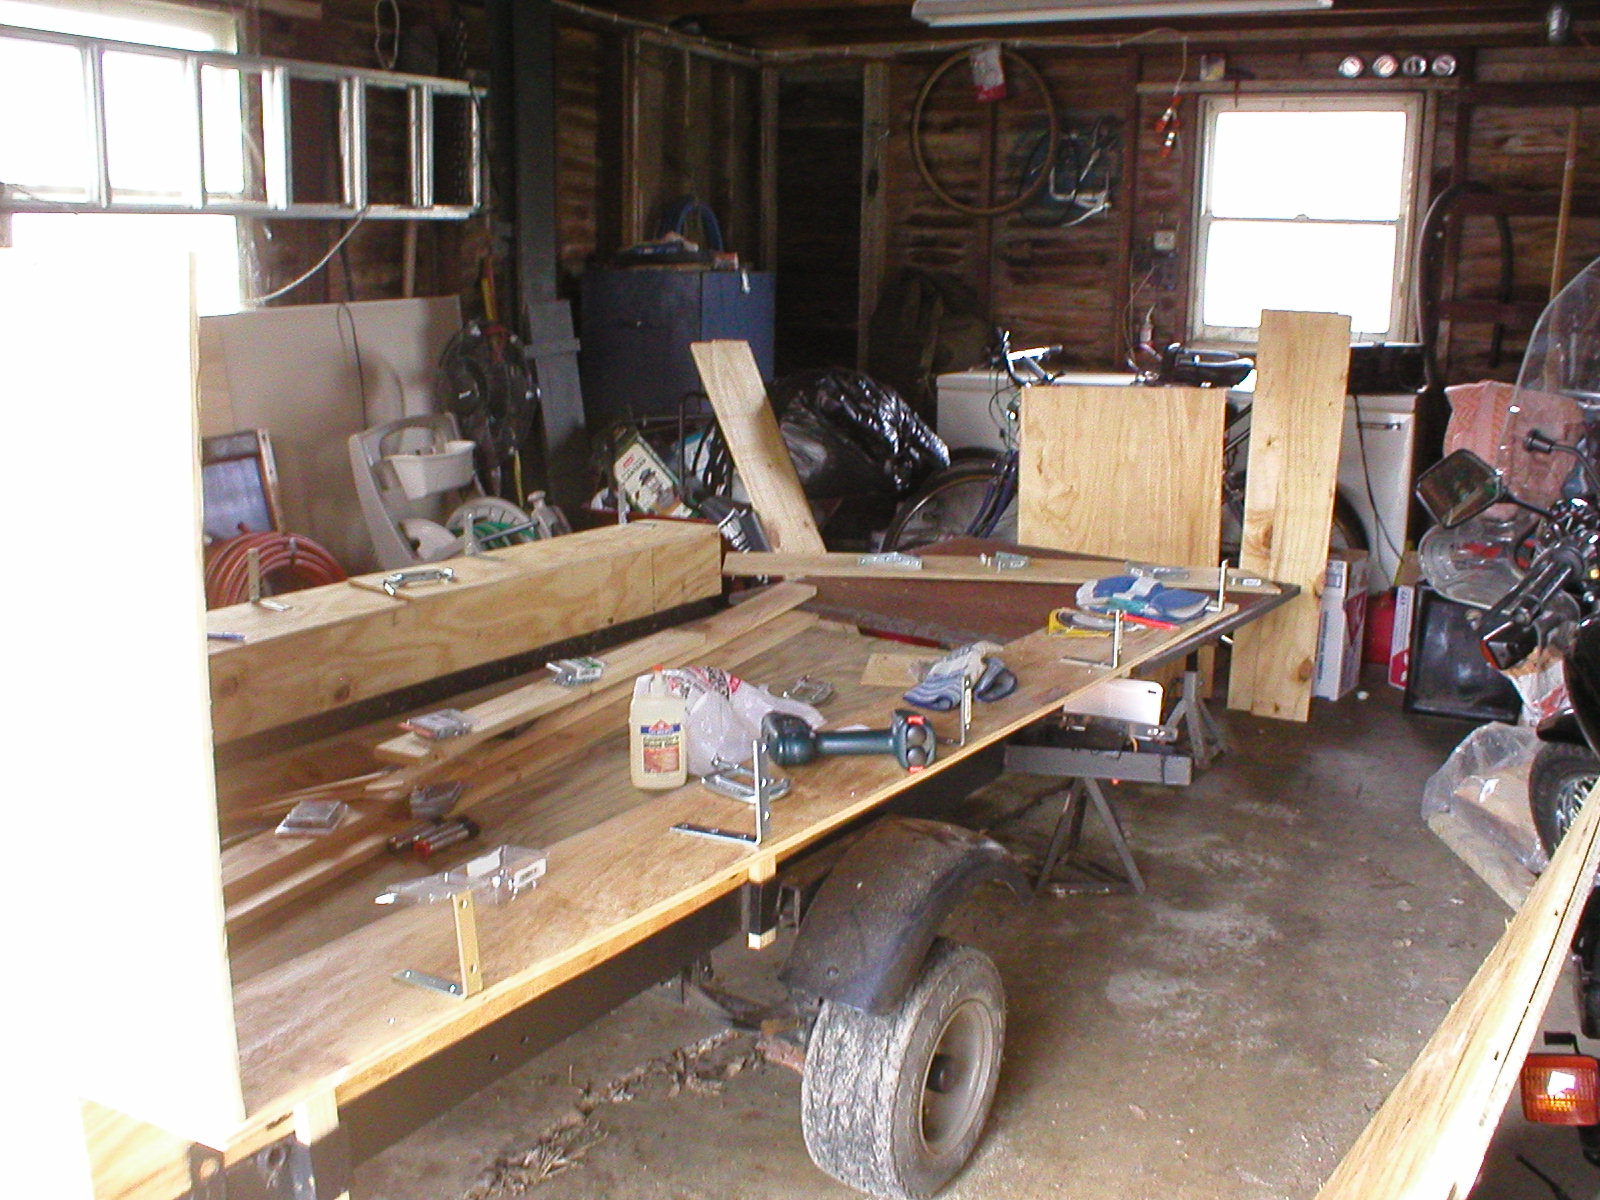
I was so busy making the trailer, I neglected to take any other construction pictures. Ah, well.
The ends of the trailer were cut out of the 1/2 inch plywood in the shape required to fit the side walls. They're not as tall as the side walls, only 3 ft tall, because I wanted the windows at the ends to be as big as possible. (Or conversely, I wanted a little extra height on the side walls to support the roof bows.) Speaking of supporting the roof bows, I took a 1x5 foot extra piece of plywood to make a "table" across the middle of the trailer to hold the side walls together against the force of the bows. You'll see a picture of it later. (Being used as a table, of course.)
1x4 and 1x6 dimensional lumber (just cheap pine, hand-picked for minimal knots), was used decoratively to disguise the plywood, and as reinforcement. I lightly stained the dimensional lumber and sealed it with spar polyurethane, and I used exterior flat latex paint on the plywood. I'll eventually paint our household badge, the wagon's name, etc. on the blank spots.
The very back of the wagon, the part that sits on the loading ramp, had to be able to come apart for travel. Door hinges with removable pins and 5/16 bolts with wing nuts were used to accomplish this.
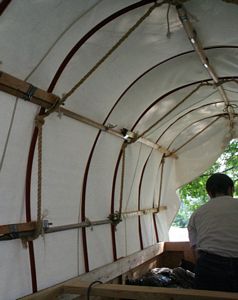
The roof bows were made of 3/4 inch flexible PVC pipe, held by 3/4 inch electrical conduit brackets. 12 ft long sections of pipe resting on the 3 ft tall wall boards provided a 7 1/2 ft peak for my husband.
Horizontal roof poles provide a surprising (and critical) amount of structural support for the roof bows and are depicted in the period illustrations. I made mine out of wooden closet rods, joined with dowel screws so they can be taken apart for easier transport. Large wood dressor knobs were screwed on to make the ends more decorative. I sealed the outer ends with spar polyurethane. (I would have sealed the whole length of the poles, but I was running out of the polyurethane.)
The horizontal poles are attached to the roof bows with shoe laces and rope. I took a piece of rope and attached it to a roof bow in such a way that, every 2 feet, there was a spot to rest the horizontal poles so we could have our hands free while we tied up the shoe laces. I did this 4 times, i.e. to every other roof bow. It's simple, but doesn't look very elegant.
The canvas roof was ordered from Tentsmiths. They sell awnings for their wall tents in lots of dimensions, one of which was perfect for the wagon. The awning came with nice loops sewn in around the edges for tie-downs. I did a teeny tiny bit of sewing to attach ties for the end windows/doors (made of Tentsmith "awning curtains"), which was a lot of work with that thick canvas and made me very glad I hadn't tried to make the whole roof myself.
So we didn't get to Lilies until well after dark. We found our group without too much difficulty (huzzah for heraldry!). And we had the wagon set up and livable in two hours, in the dark, with only one person there who actually knew how the thing went together. Thank goodness I'd set it up once at home and worked out the major kinks. (I.e. must fasten horizontal poles to roof bows BEFORE trying to pull canvas up, or it all slumps over.) And thank goodness Sifrid is mechanically inclined.
The wagon survived a nice storm the first day. She shook, she shimmied, but she stood! And the only water inside was a tiny bit of spray around the canvas doors during the gale-force horizontal rain part of the storm.
The project became an interesting bit of experimental archeology. When I designed the roof of the wagon, I decided to follow the originals as closely as possibly in structure, if not necessarily in materials (although only wooden bows were out of my budget, the wooden poles and canvas cover that I used were at least plausibly period) with the simple intention of getting the correct look. But it turns out that each component: the bows, the horizontal poles and the canvas cover, itself, are intrinsic to the structural integrity of the roof of the Wagen. The bows by themselves jiggle from side to side alarmingly. Once you attach the horizontal poles, tying them securely at every intersection, the top stabilizes considerably, but still wobbles quite a bit. Then after the canvas cover is tied down, it snugs down around the poles and stops almost all the remaining movement. And since canvas shrinks when wet, the structure becomes even more secure in a rain storm.
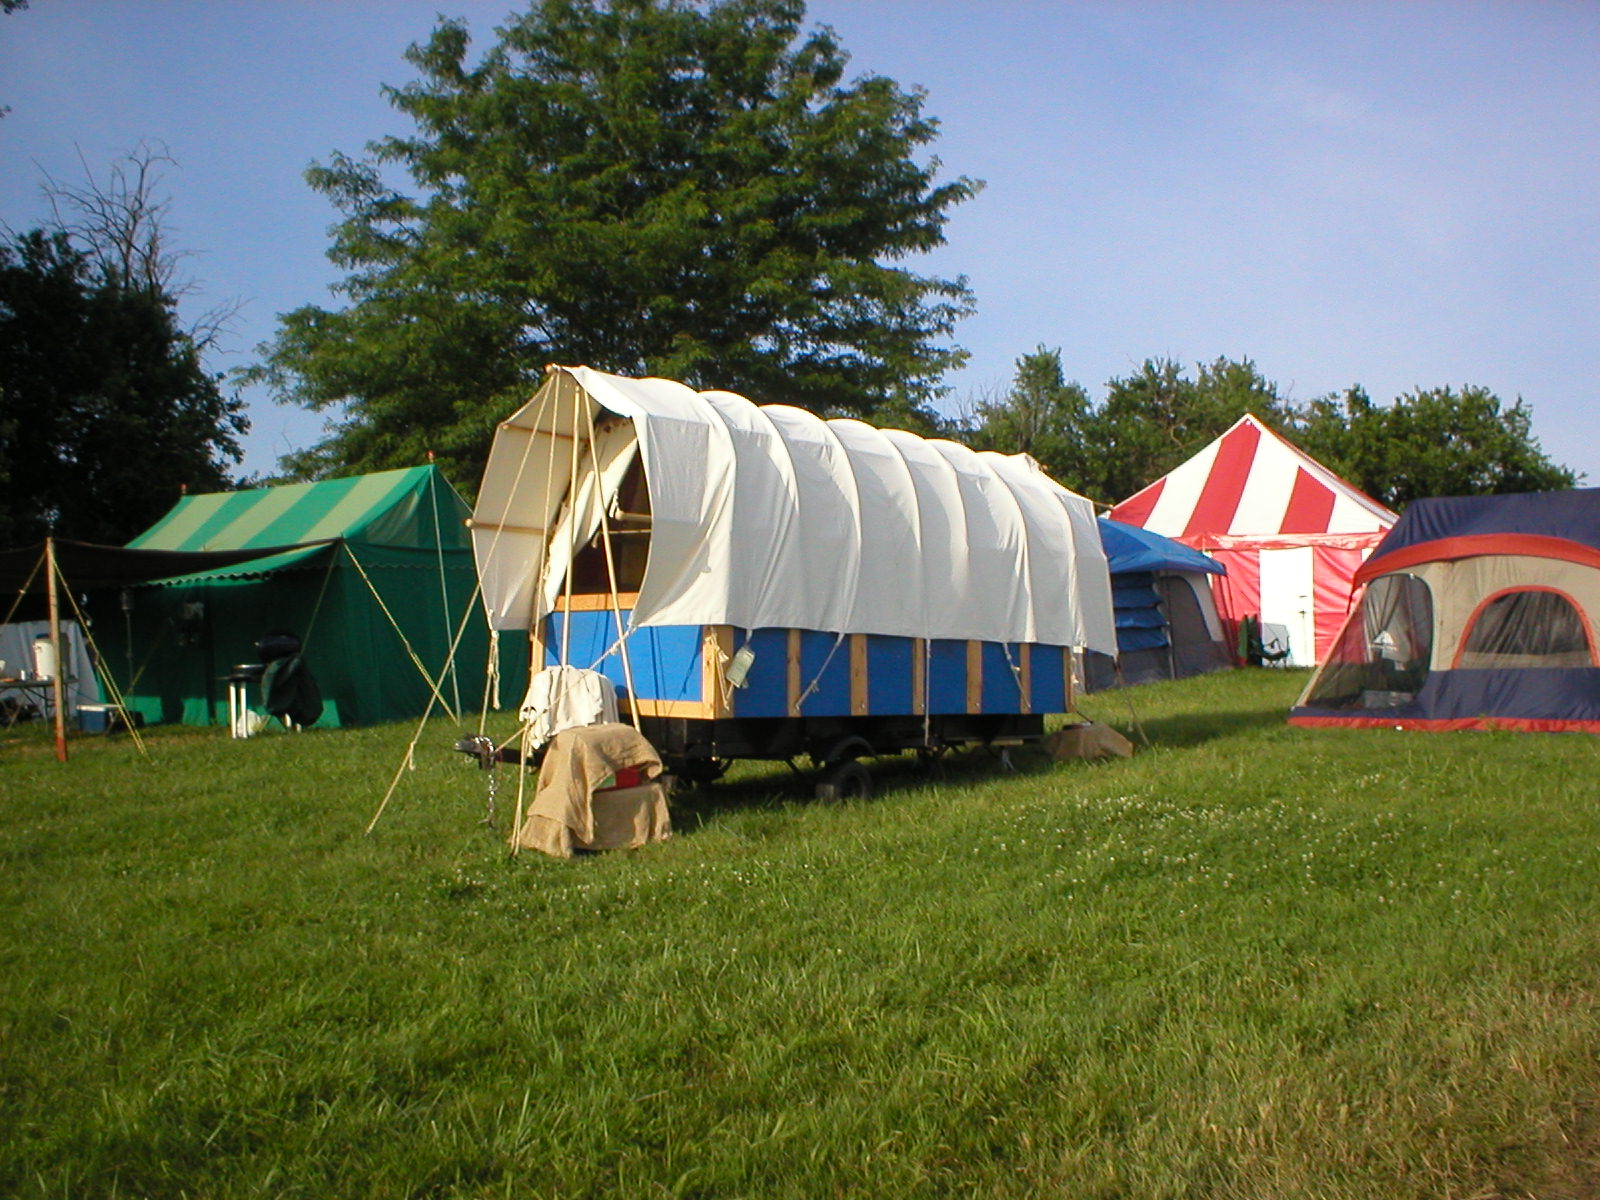
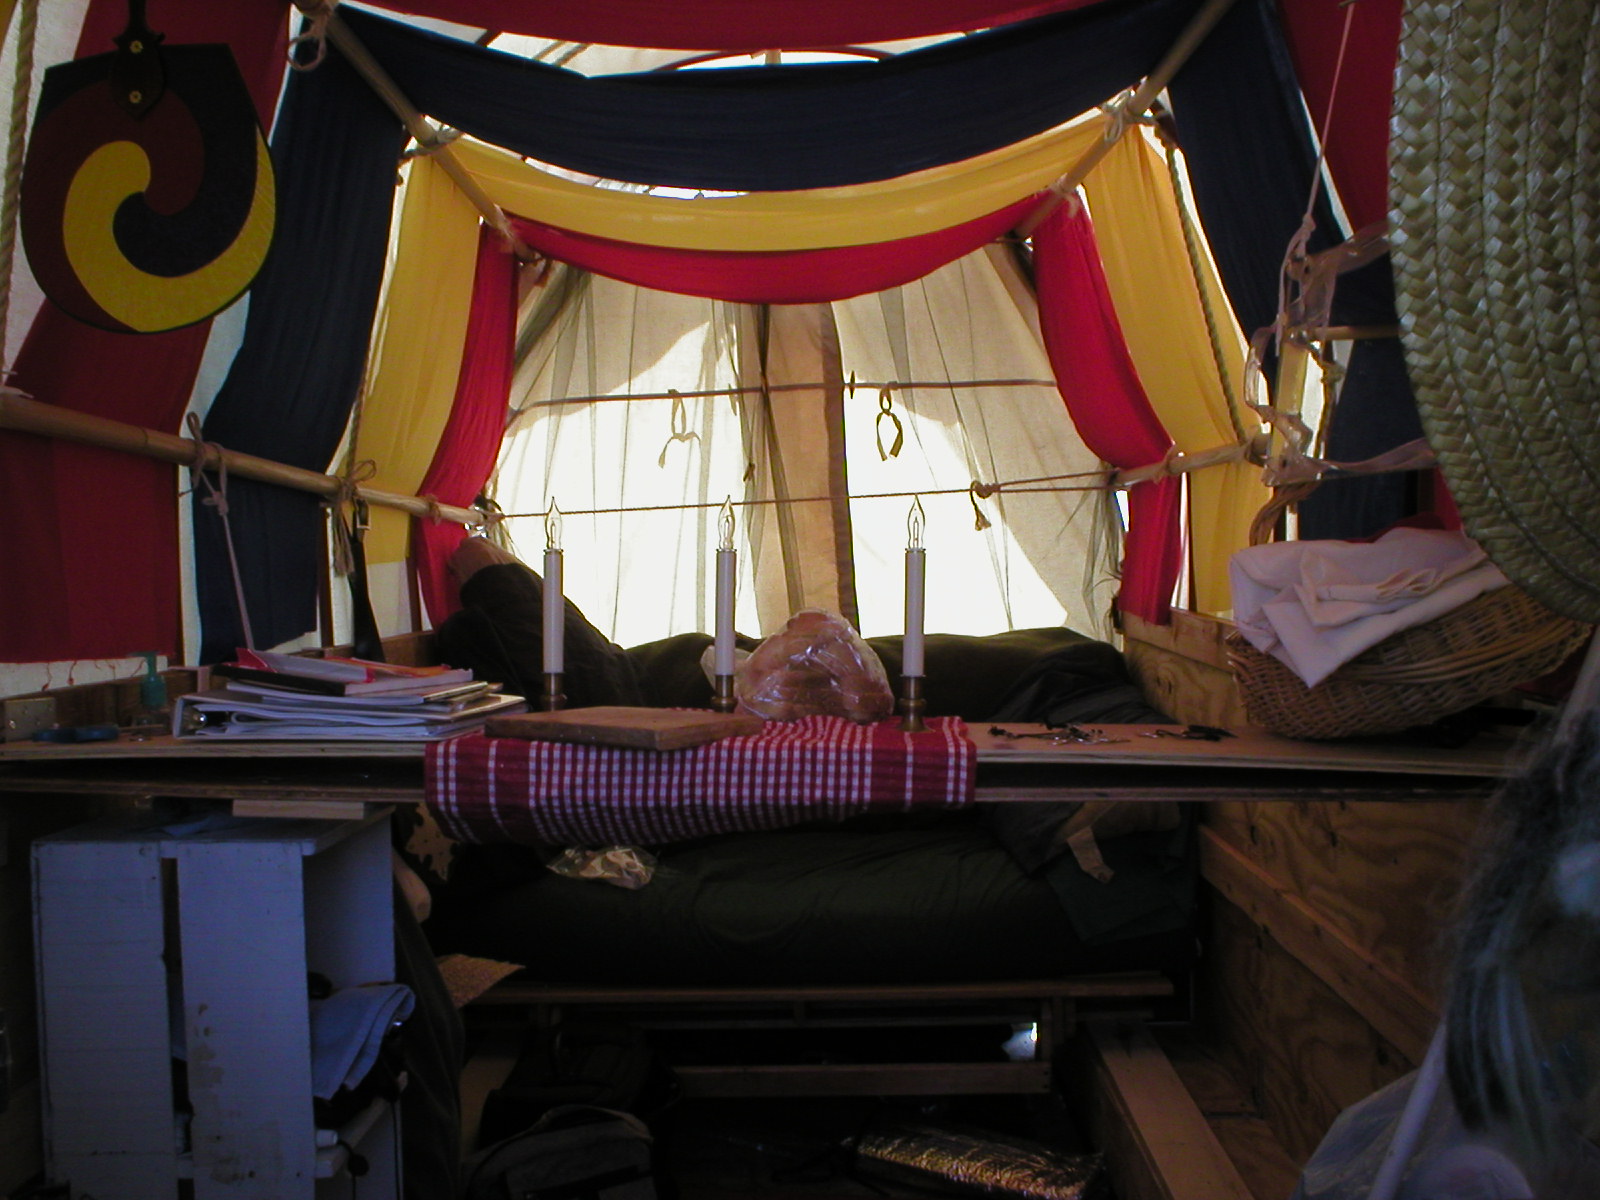
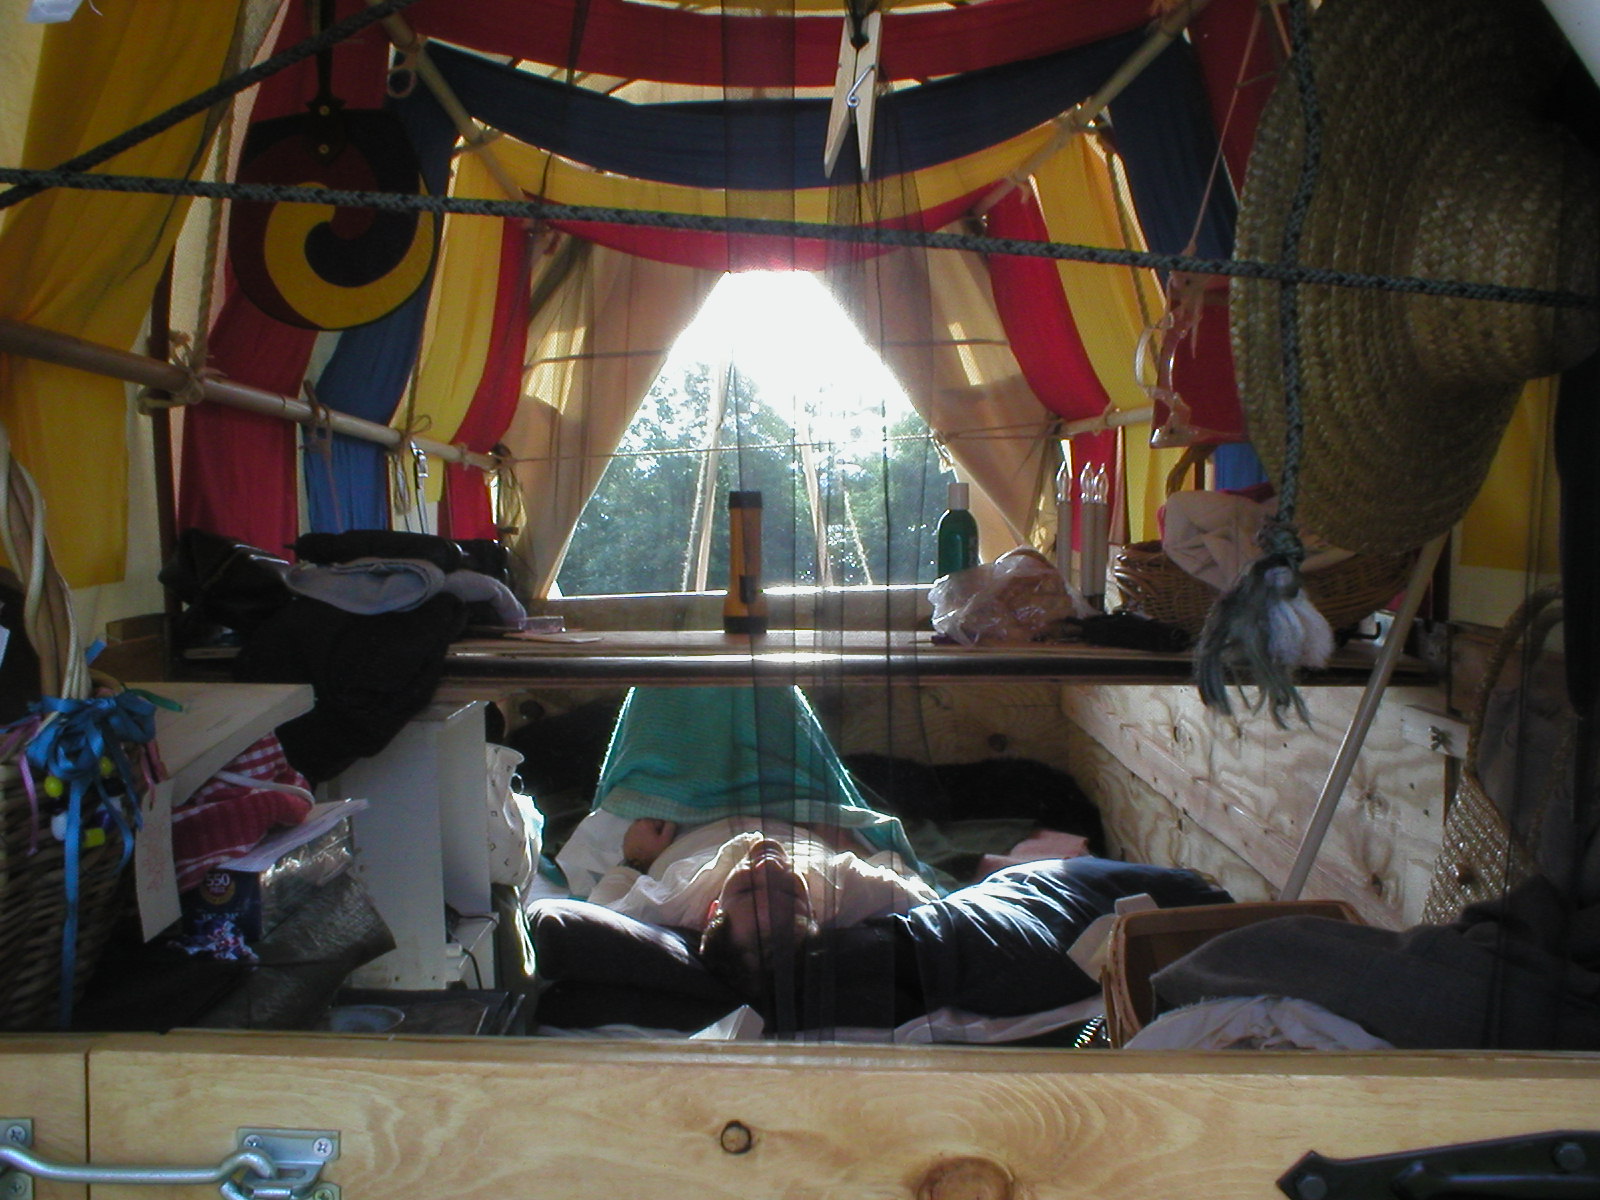
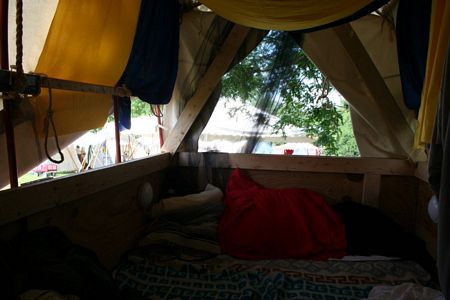
The colored fabric inside was an afterthought - meant to create a dead airspace next the the canvas and shade for cooling. Sifrid thinks it helped a little. This is important, because the shade fabric impinged on his head room. If nothing else, the fabric was definitely decorative, and helped disguise some of the construction details.
 Phase II
After the wagon's first season I realized that the roof bows needed to be a little stronger, so I got some 1/2 inch flexible PVC pipe and slid the pieces inside the original bows to stiffen them. I also took extra pieces of the curtain rods I used to make the horizontal poles to make cross-bracing. (Sorry, I don't have a good picture of that right now.)
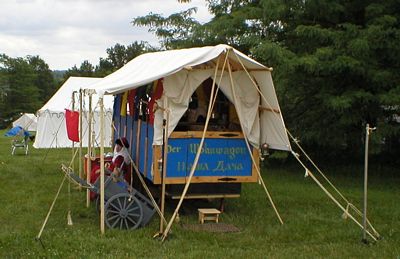
I also came up with the idea to open up the side of the wagon - shade and shelter outside, and extra ventilation inside. If there is any sort of wind the whole roof wants to take off, so we have to close it up if we leave the camp. I'm still working on that. The wooden supports can stay up when the canvas is closed up and make a convenient place to hang wet towels, although our friends sometimes refer to them as our gallows.
You can see that I had started on the decorative painting, but the name, Der Wohnwagen aka Наша Дача (Nasha Dacha, our summer home), is as far as I got.
 Phase III
After three camping seasons, I decided to do some major remodeling on the Wohnwagen in 2008. We had gotten tired of having to reassemble/disassemble the back 4ft section every time we moved the Wagen. And the whole thing was showing some wear and tear as the weaker connections sagged.
So I used 2x8 lumber to make joists to support the back 4ft section so it can be left permanently in place, which also required shifting the axle back to maintain the proper balance of the trailer. I added a skeleton of 2x4 framing to stiffen up the rest of the structure for better highway travel. I also lowered the sides a few inches to be even with the front and back, and therefore better supported and more aerodynamic (hopefully).
And to finish it off, I made a rigid cover for traveling.
I'll have to re-do the painting now.
The end bows still sag too much when the weather get hot, even with the nested PVC pipes, so in 2009 I made a 2x4 A-frames to support each end. That year I also installed shelving to help organize our things.
In 2010, I replaced the old futon bed with a built-in bed which can be converted into a U-shaped bench (once I make new cushions to replace the futon mattress), and is easier to store things under.
Also in 2010, my husband replaced the old axle which was bending strangely and shedding lug nuts at an alarm rate. After we got it off, we discovered that it was cracked all the way around in the middle! We're lucky we made it home from Lilies in 2009!
Rigging the camp kitchen to sit better on the tongue.
Decorative painting - heraldic devices, names, etc. Perhaps even including the canvas, like in the Luttrell Psalter... or perhaps not - issues of fading, loss of "breathability"...
Period-looking wheels!
A built-in propane refrigerater?