Tatiana's Sarafan Construction
The following information has been posted on behalf of Her Excellency, Viscountess Tatiana Nikolaeva Tumanova, OL. Please contact her if you have any questions.
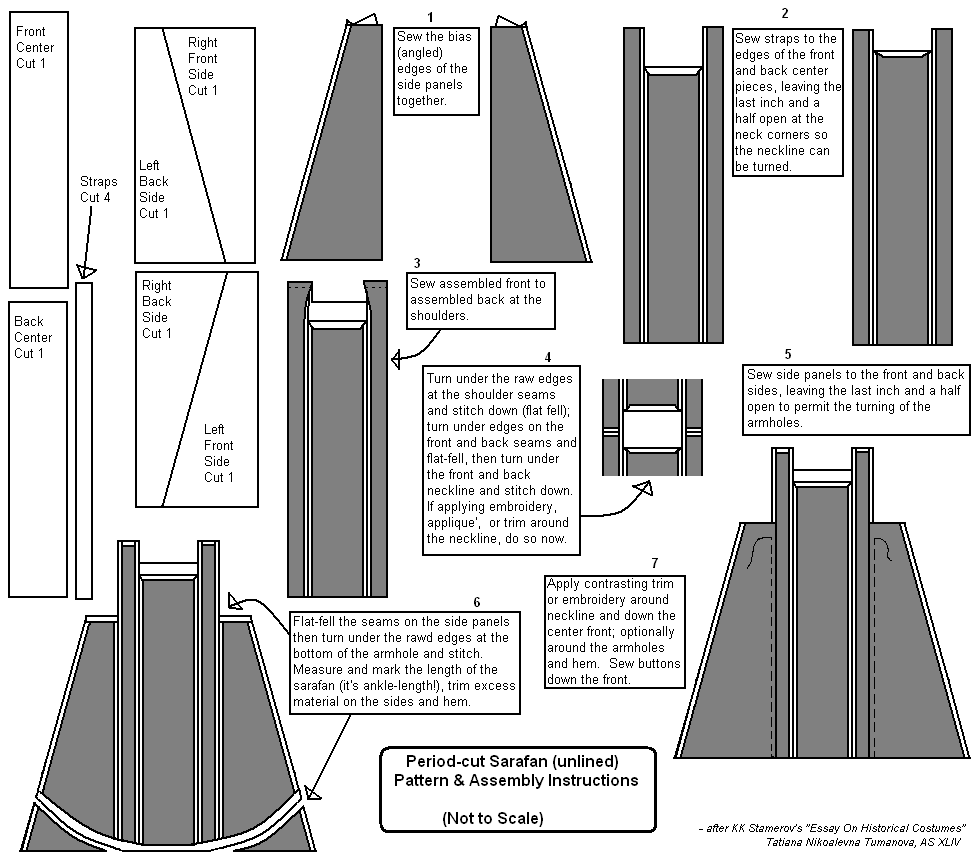
The sarafan isn't that hard to assemble. The only mistake that's easy to make on the sarafan is forgetting to flip the diagonal line when cutting the two rectangles into right-triangles for the side gores. If you forget, you end up with four triangles all pointing the same way! You also do not want to cut the "straps" for the front and back in one long continuous piece – there needs to be a shoulder seam, because most people do not have perfectly squared off shoulders (in fact, none of the people I know do!).
Sarafan Assembly:
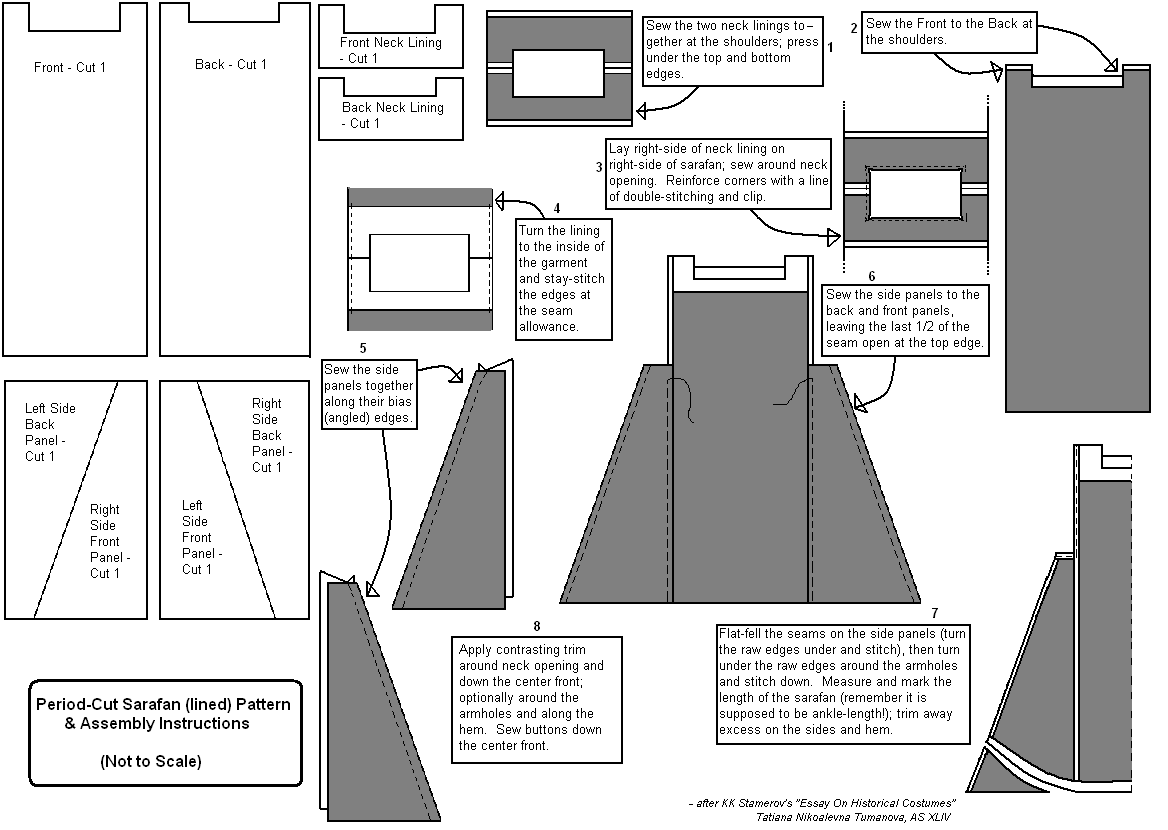
1. Assemble the front: sew the long rectangular "straps" to the sides of the center panel, leaving the last half-inch unsewn. If the center panel was going to have embroidery on it, do that before assembling the garment. If the sarafan is going to be lined, or have a facing, the front can be cut as a single piece (a rectangle with a rectangular notch for the neck hole). If the sarafan is going to open down the front, divide the center panel and add two inches to each piece for an overlap.
2. Assemble the back, the same as the front. Again, if the sarafan is going to be lined, or have a facing, the front can be cut as a single piece (a rectangle with a rectangular notch for the neck hole). The center back panel should be longer than the front so the neck hole isn't as deep at the back.
3. Sew the back to the front at the shoulders; adjust the seam so the garment hangs straight (the seam is going to be angled – how much depends upon how much your shoulders slope).
4. Assemble the side panels (gores). Place two of the right triangles together, right sides in, and sew them together along the long (angled) side – the straight sides will be sewn to the front/back pieces.
5. Attach the sides. Right sides together, sew one of the assembled gores to the front piece. If the sarafan is not going to be lined or have a facing, leave the seam open for half an inch at the top edge. Sew the gore to the back piece, again leaving the seam open at the top edge if the sarafan is not going to be lined/faced. Repeat for the other side. If the garment is going to be embroidered or have trim applied around the neck opening, do this now.
6. Turn under the raw edges around the neck opening and the armholes. If the sarafan is going to lined, assemble the lining as above, then placing right sides together, sew the lining down around the neck opening. Turn the lining to the inside; slip-stitch the lining to the body of the sarafan around the armholes. If the sarafan has a colored facing, sew the right side of the facing to the wrong side of the garment, turn the facing to the outside, and stitch down the edges.
7. Measure, cut (remove excess material on the sides at the hem), and hem the sarafan. If the sarafan is lined, slip-stitch the lining to the upper edge of the hem.
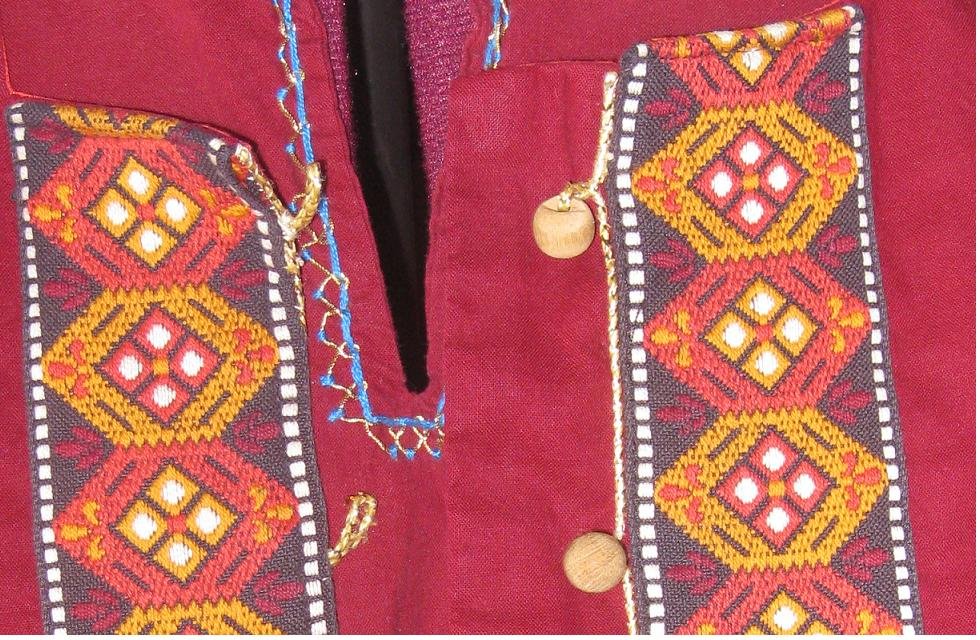
8. Apply trim/embroidery down the front of the sarafan and around the hem if desired. Note: sarafans always have trim/contrasting color around the neck opening and down the front so far as I've found – around the armholes and hem are optional. If the sarafan is going to open down the front, couch down a cord on one side of the center opening. At intervals, make a loop in the cord and knot it; the loop should be large enough to go around the buttons. On the opposite side, slide buttons onto a cord and couch it down, matching the buttons up with the loops (or sewn the buttons to the cord after it's been couched down, if the cord won't fit through the shank of the button). Tip: be careful of the button placement, if you measure it wrong you'll get gaping at the widest part of your chest. Recommend putting the garment on and pinning it together, adjusting it until it's right, then marking the spots for the buttons with pins. It also works better if both sides of the opening are worked on at the same time – go down one side and make a loop, then go down the other side and add a button, then button the two sides together to make sure they're lining up properly before continuing on down the garment. Sew buttons down the center front seam or panel if the sarafan is not going to open, or place them off to the side of the center strip of decoration.